
Recently, I had taken part in a maintenance weekend at the office, post maintenance, Our IPSentry dashboard, (we use IPSentry for some of our monitoring), reported a couple errors, which was fixed.
Come Monday morning, a colleague of mine noticed that certain systems were down, which he brought up. I did some further investigation and noticed one of our DHCP pools were running out of leases. I wanted to see if IPSentry could monitor DHCP addresses, and as it turns out, it can.
It took me a while to figure this out, but now I know it, I’ll add it here for the world to share.
As mentioned before, in order to monitor DHCP leases, you would need to make use of the SNMP Addin for IPSentry.
So here are the prerequisites:
- Windows Server with a DHCP Server Role installed and the SNMP Service
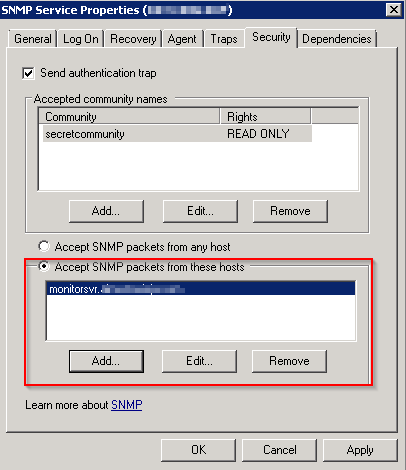
- Ensure that you have configured SNMP security on the windows server
- IPSentry Instance with SNMP Addin
- DHCP-MIB.MIB and MSFT-MIB.MIB. Copy these files to C:\Program Files (x86)\RGE INC\IPSentryV5\Addins\IPSSNMPMonV5\MIBS\
Log into the appropriate ipsentry machine using the IPSentry Service Account.
Launch Ipsentry Network Monitor if the console is not already visible.
- Pause Monitoring
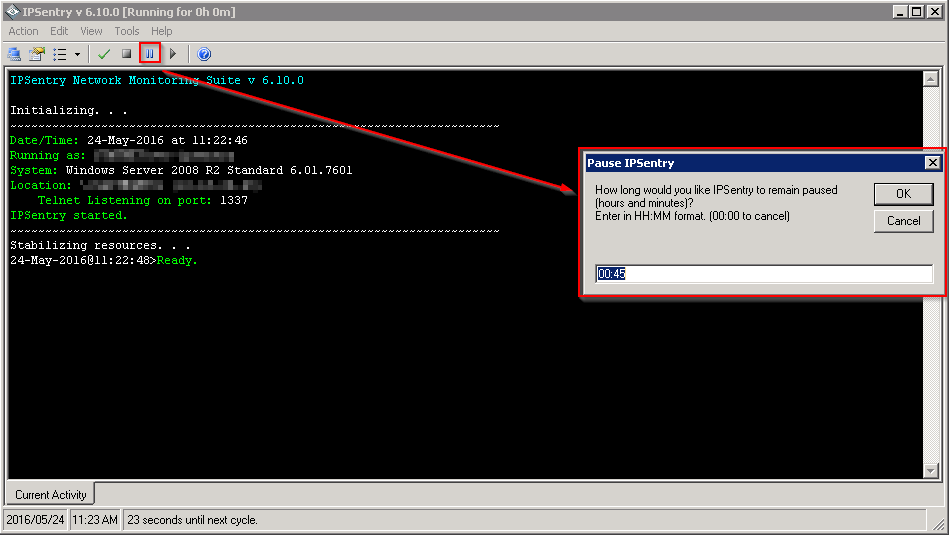
- Click on the
 and just Pause IPSentry for 45 minutes.
-
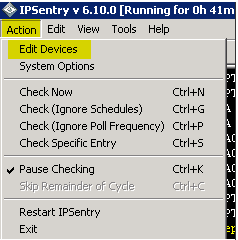
Go to Actions -> Edit Devices
- Search for the server that would have the DHCP Server Role installed. If it doesn’t exist, add it.

- Right Click the Server -> Add New -> Add-Ins -> SNMP Monitor and Alert

- Use the name: SERVERNAME – DHCP Address Monitor, (OR whatever you prefer to call it) Click on Configure
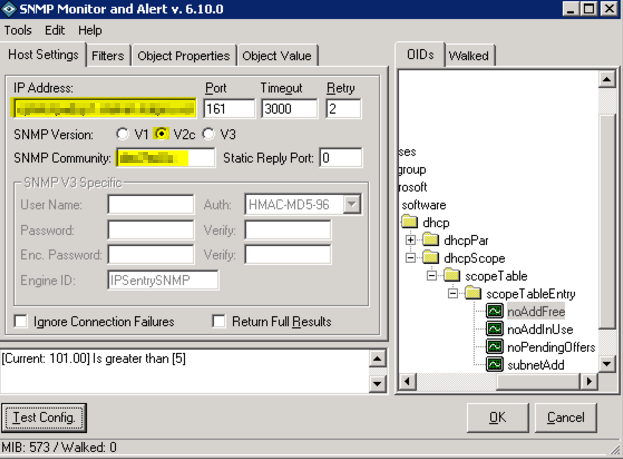
- Add the hostname or ip of the DHCP server. Select the SNMP version and enter the SNMP community that you chose earlier on.
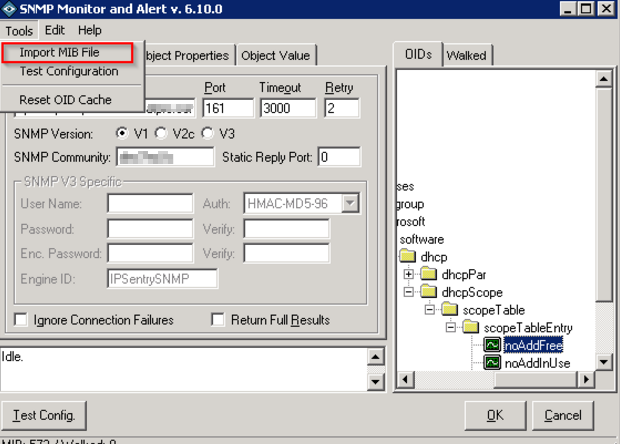
- Click on Tools -> Import MIB File. Browse to C:\Program Files (x86)\RGE INC\IPSentryV5\Addins\IPSSNMPMonV5\MIBS\ and select DHCP-MIB.mib

-
You’ll be asked to load the MSFT-MIB. Browse to C:\Program Files (x86)\RGE INC\IPSentryV5\Addins\IPSSNMPMonV5\MIBS\ and select MSFT-MIB.mib. Click OK

- Expand to: +iso.org -> dod -> internet -> private -> enterprises -> microsoft -> software -> dhcp -> dhcpScope. Click on Edit -> Walk MIB. This will pass the connection through and present you with the configured address pools.

- Expand to +dhcpScope -> scopeTable -> scopeTableEntry -> noAddFree -> xx -> xx. Each xx would be an octet in your IP address. In here will list the subnets you have listed. Double click on one.
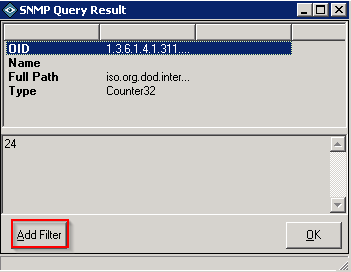
- Click on Add Filter
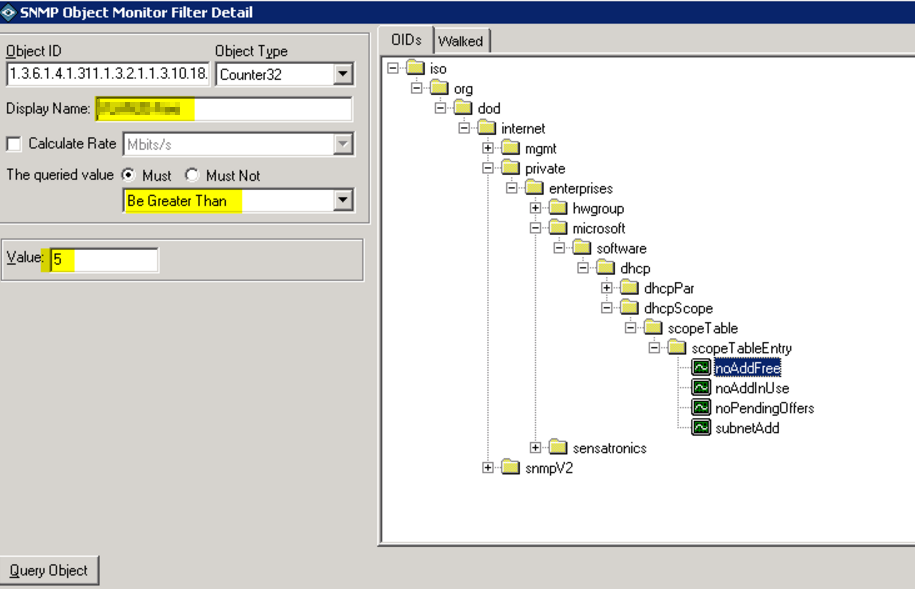
- Display Name: -Select whatever you would want this to display as. (E.g. SubNet_XX-Free). Configure the queried value to: Must -> Be Greater than -> 5. This basically means, don’t alert until you have less than 5 free addresses.

- Click on Test. The Machine Result should be OK.
