
Configuring the Nodes - Shared Location
The following process is a standard share with permissions added.

Browse to the folder you wish to share, right click > Properties. Click on the Sharing tab, then click Advanced Sharing

Place a tick next to Share this folder and click on Permissions

Highlight Everyone and click on Remove.

Click on Add

Add the users and or groups, click on Check Names to verify they actually exist. Click on OK

Select each account that was added and ensure that Full Control has been ticket. This will tick all the boxes. Click OK
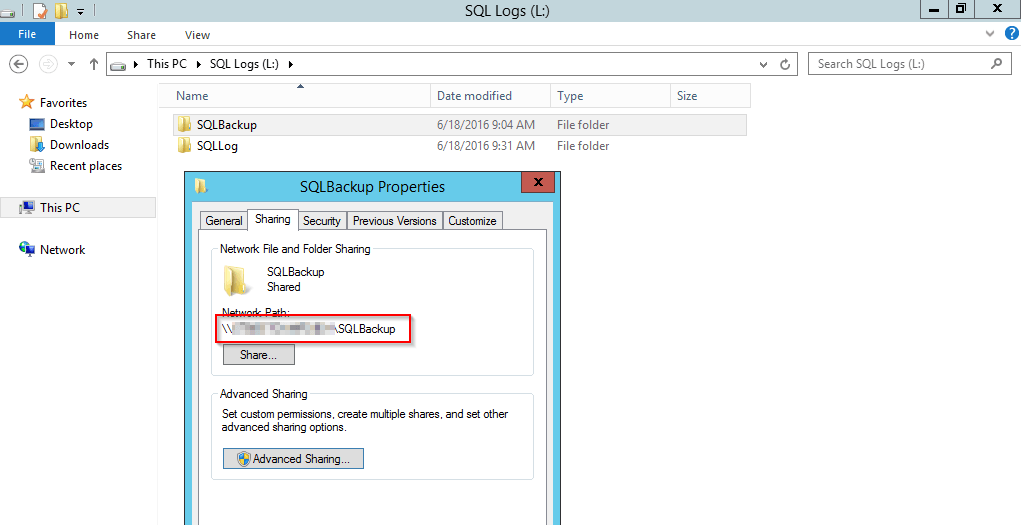
This will show that the path has now been shared.

Click on the Security tab (This is owned by the original SQL Server Service Account prior to updating the login for this). Due to this, we need to click on Advanced

Click on Change next to Owner

Add the SQL Server Service Account. Click on Check Names to verify the account actually exists. Click OK

Click on Add

Click on Select a principal

Search for a group and or user. Click on Check Names to verify the account actually exists. Click OK

Ensure Modify has been ticked. This will automatically tick Write. Click OK

This displays the permissions have been added. Click OK

Click OK